This is an old revision of the document!
Table of Contents
Character creation
Character creation is the first step you need to take before you can enter the Zone. There, you will select your class, difficulty, and starting location.
Class
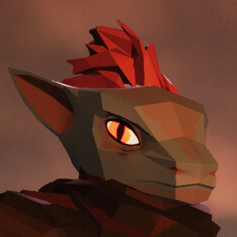
Selecting a class is an important choice, as it's what dictates your appearance, starting cash/items, debt, and attributes.
As of version 0.14.3 of the alpha demo, these are the available classes:
| Class | Pronouns | Starting cash | Debt | Attributes | Starting items |
|---|---|---|---|---|---|
| Castaway | They/them | 0$ | 3448575$ | None | Lighter, bill of debt |
| Wanderer | He/him | 23$ | 3015220$ | Weird luck | Expedition light armour, duffle bag, note from Ray |
| Veteran | He/him | 350$ | 2670450$ | Steady aim, lingering trauma | Rebel fatigues, bandage, MRE, 14 5.6mm FMJ, PK-52 scout rifle, Revolutionary army: orders |
| Assassin | She/her | 64$ | 5205480$ | Sneaky, brawler, hemophilia | Cat suit, rondel knife, black market flyer |
| Artificer | She/her | 521$ | 7109275$ | Eather affinity, collector, hunger | Field research coat, 6 .45 ACP, snub-nose revolver |
| Wretch | They/them | 0$ | 9999999$ | Intense personality, nudist, thin skin | Nothing |
Additionally, there is a random option that gives you a random name and backstory, attributes, and a duffle bag with random gear inside.
Difficulty
This choice is the most important, as it will determine what happens when, not if, you die.
Difficulties are divided into two major categories, depending on the respawn type:
- Load save: each time you die, you respawn at your last save.
- Extraction: each time you die, you respawn at the last bed you slept at.
Alongside the pre-made difficulties, there is also a “custom” choice that allows you to change any of the settings mentioned below.
Load save
| Difficulty | Permadeath | Loot replenishes | Save on transitions | Save slot locked |
|---|---|---|---|---|
| Mercy | No | Yes | Yes | No |
| Perma-death | Yes | No | Yes | Yes |
Extraction
Difficulties with this respawn mode come with additional parameters:
- Items to keep: how many items you can keep when respawning.
- Contract failure: whether some contracts can fail if you die.
- Slot loss: if yes, each time you respawn, the number of items you can keep on death is reduced by one. If it reaches 0 and you die again, your save file is wiped.
- Drop remaining loot: if yes, items you don't keep can be found in a backpack where you died, else they're lost forever. If you die again before reaching a dropped backpack, its content are lost forever.
| Difficulty | Loot replenishes | Save on transitions | Save slot locked | Items to keep | Contract failure | Slot loss | Drop remaining loot |
|---|---|---|---|---|---|---|---|
| Expedition | Yes | Yes | Yes | 5 | Yes | No | Yes |
| Scavenger | No | Yes | Yes | 0 | Yes | No | Yes |
| 9 lives | Yes | Yes | Yes | 9 | Yes | Yes | No |
Starting location
The following starting locations are available:
- Intro: this starts you in the River Dock, the intro/tutorial dungeon. See its page for more information. This is the recommended choice for beginners
- Observatory: you start at the entrance to Observatory, the first safe zone in the game.
- Random: picks a somewhat safe spot in a random region from the south part of the world map.

